
description DIY Epoxy River Table Overview
This project creates a decorative river table using epoxy resin. The process involves pouring colored resin onto a wooden substrate with embedded elements such as rocks and wood slices to produce a layered, flowing design mimicking a natural river. It’s suitable for experienced DIY enthusiasts interested in woodworking and advanced resin projects seeking unique furniture pieces for their homes.
help DIY Epoxy River Table FAQ
What materials do I need to build a DIY epoxy river table?
To build a DIY epoxy river table, you will need thick tabletop pour epoxy resin, colored pigments, and natural wood slabs for the substrate. You will also require basic woodworking tools and natural elements like rocks or wood slices to embed within the pour.
How do you prevent bubbles when pouring epoxy resin for a river table?
To prevent trapped air bubbles in the natural elements and wood slices, you must seal the wood substrate with a thin layer of epoxy before the main pour. Additionally, using a heat gun or torch over the thick tabletop pour helps release bubbles during the curing process.
What is the best way to create the layered, flowing effect in an epoxy river table?
The flowing effect is typically achieved by embedding colored resin and natural elements like rocks within the thick tabletop pour over a sturdy substrate. By pouring the epoxy in careful stages, you can create a layered visual depth that mimics a natural river.
How long does it take for a DIY epoxy river table to fully cure?
While the epoxy may feel dry to the touch within 24 hours, it typically takes several days to a week to fully cure before heavy sanding can begin. The exact time depends heavily on the ambient room temperature and the total thickness of your resin pour.
explore Explore More
Similar to DIY Epoxy River Table
compare_arrows Compare: DIY Live Edge Slab Table See all arrow_forward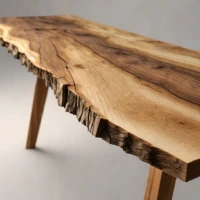



Reviews & Comments
Write a Review
Be the first to review
Share your thoughts with the community and help others make better decisions.


